Setting Up Your Event Website
Every EventHex event gets its own website where attendees can view event details, browse sessions and speakers, and register for tickets. Before customizing the design, you need to choose how your website works.
Step 1: Choose Your Website Mode
Section titled “Step 1: Choose Your Website Mode”Go to Design → Website Mode in the left sidebar.
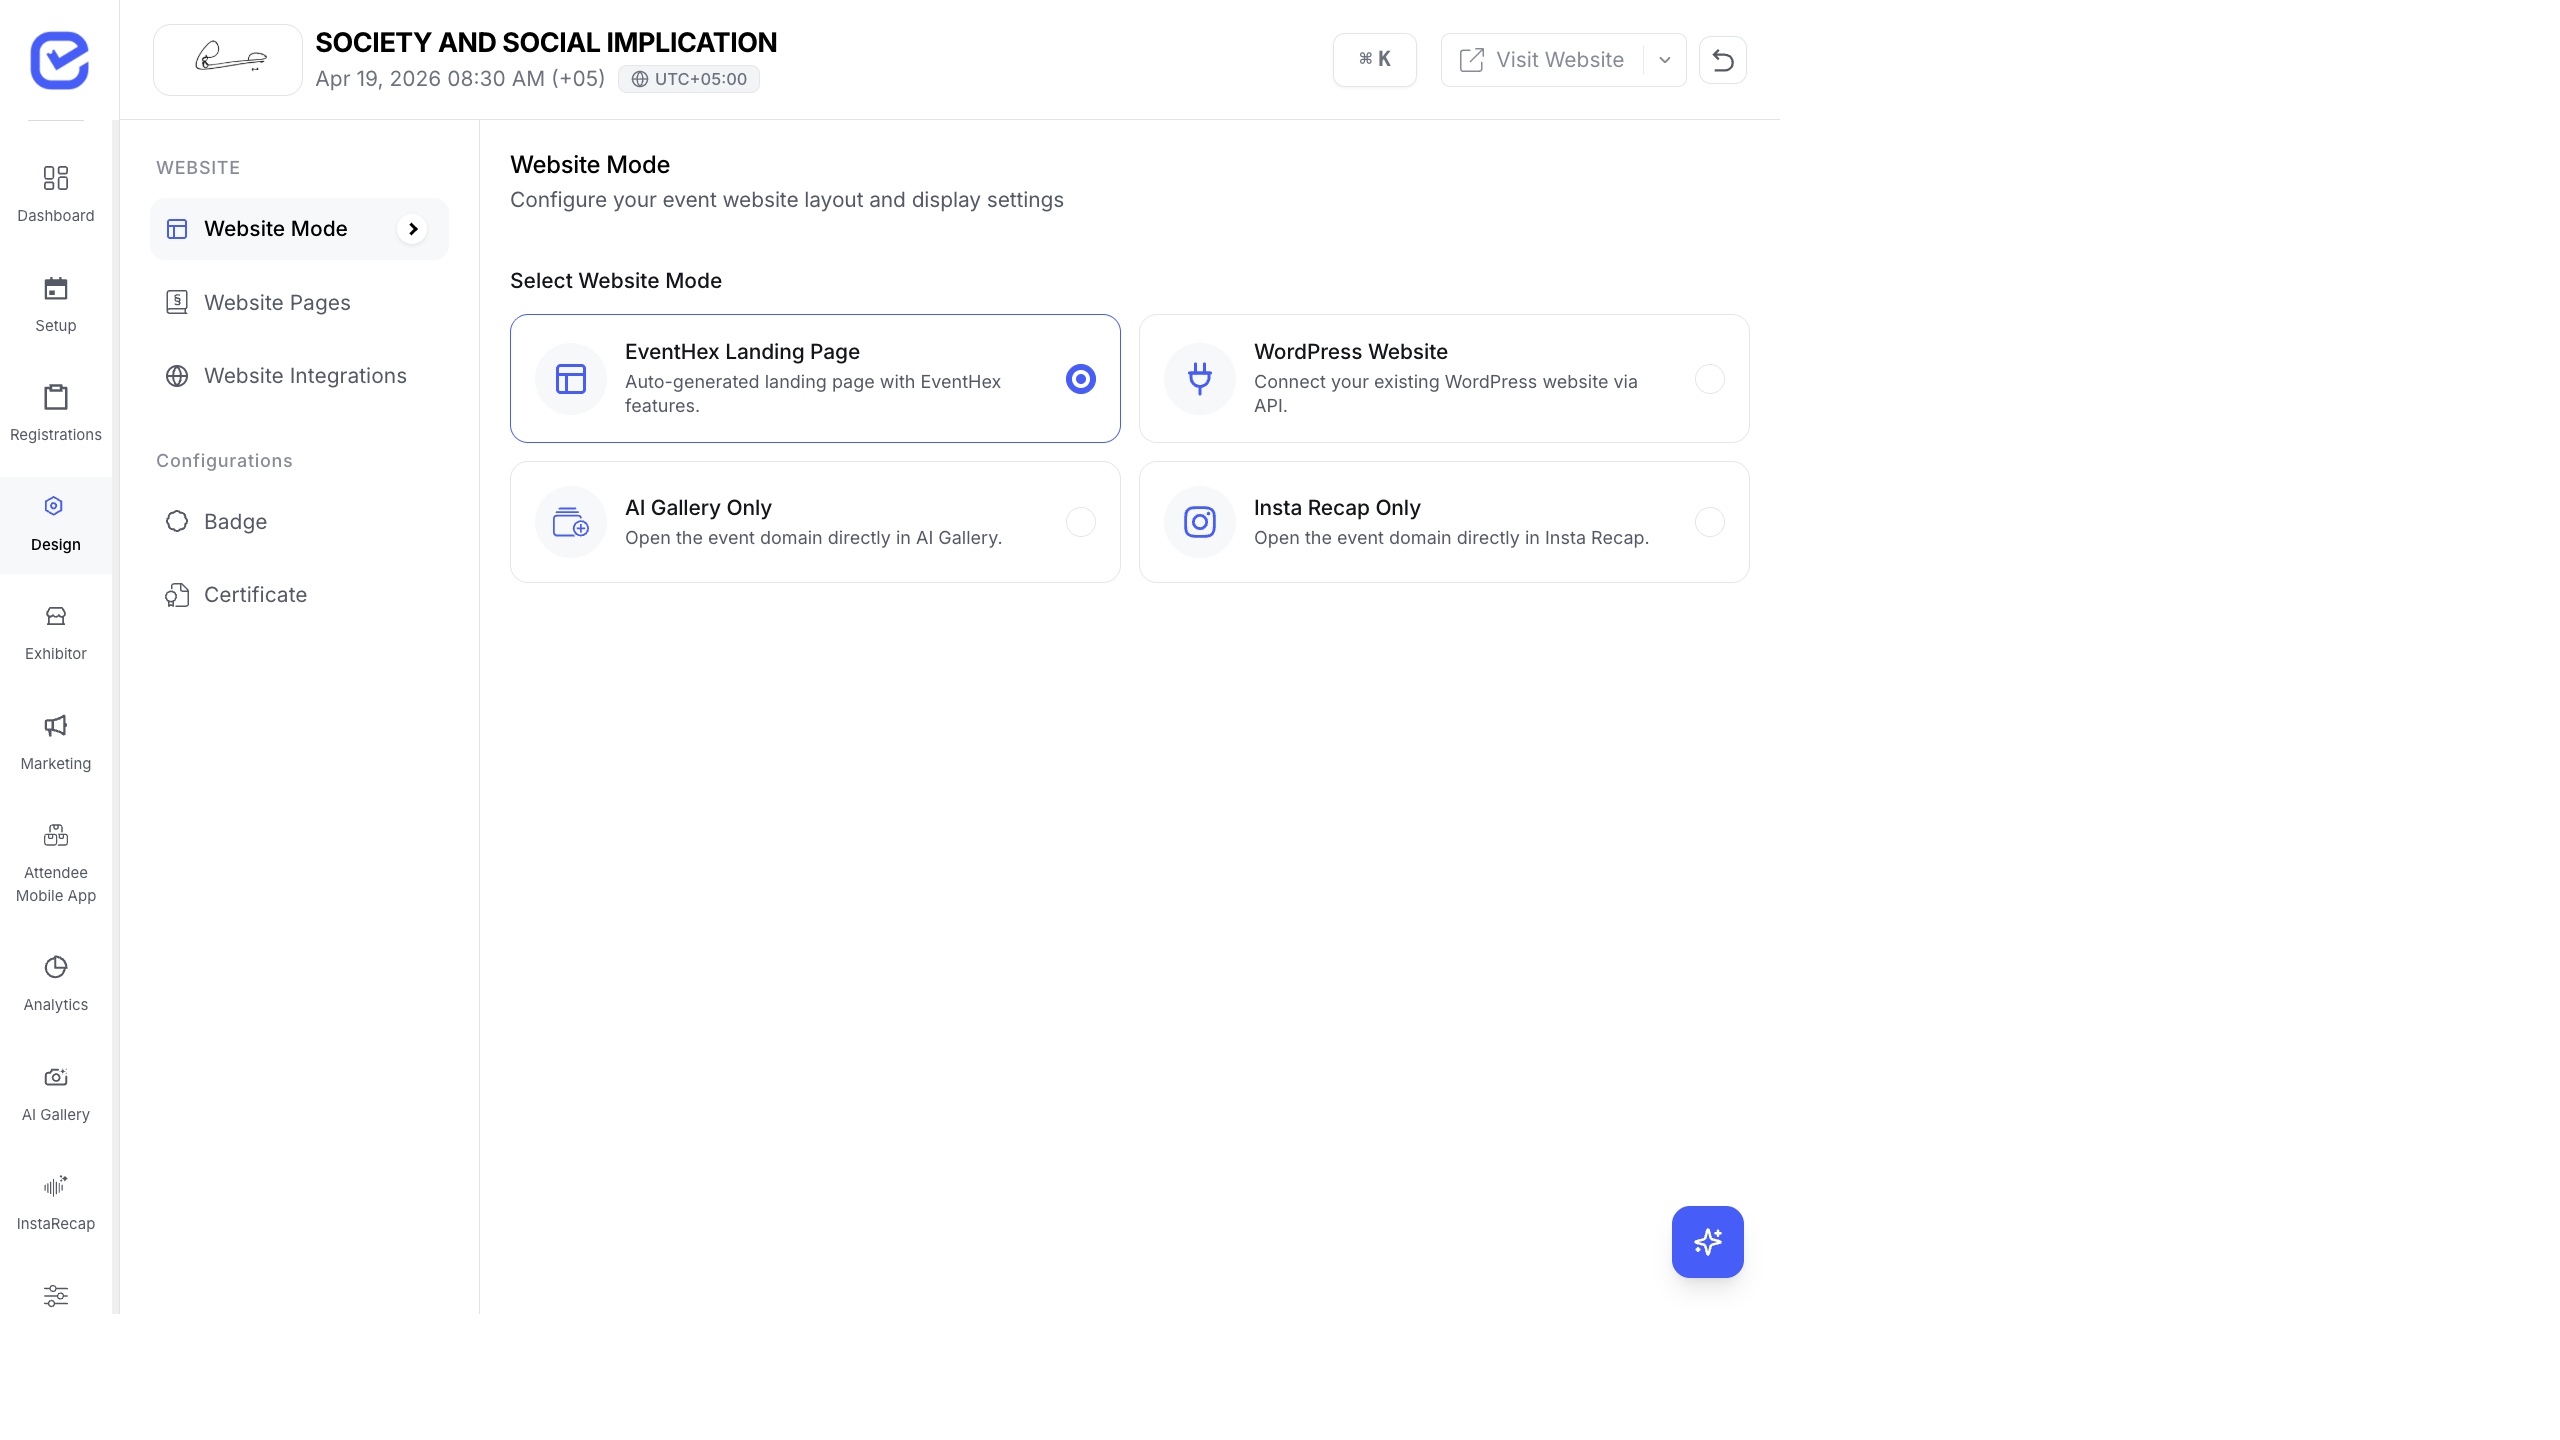
EventHex offers several website modes depending on your needs:
| Mode | What It Does | When to Use |
|---|---|---|
| EventHex Landing Page | Auto-generated event website with drag-and-drop page builder | Most events — this is the default and recommended option |
| WordPress Website | Connect your existing WordPress site via API | You already have a WordPress website and want to embed EventHex features |
| AI Gallery Only | Your event URL opens directly into the InstaSnap AI Photo Gallery | Photo-centric events where the gallery is the main product |
| Insta Recap Only | Your event URL opens directly into InstaRecap session summaries | Post-event content distribution where recaps are the priority |
- Go to Design → Website Mode.
- Select your preferred mode by clicking the radio button.
- The selection saves automatically.
Step 2: Enable Your Website Pages
Section titled “Step 2: Enable Your Website Pages”Go to Design → Website Pages.
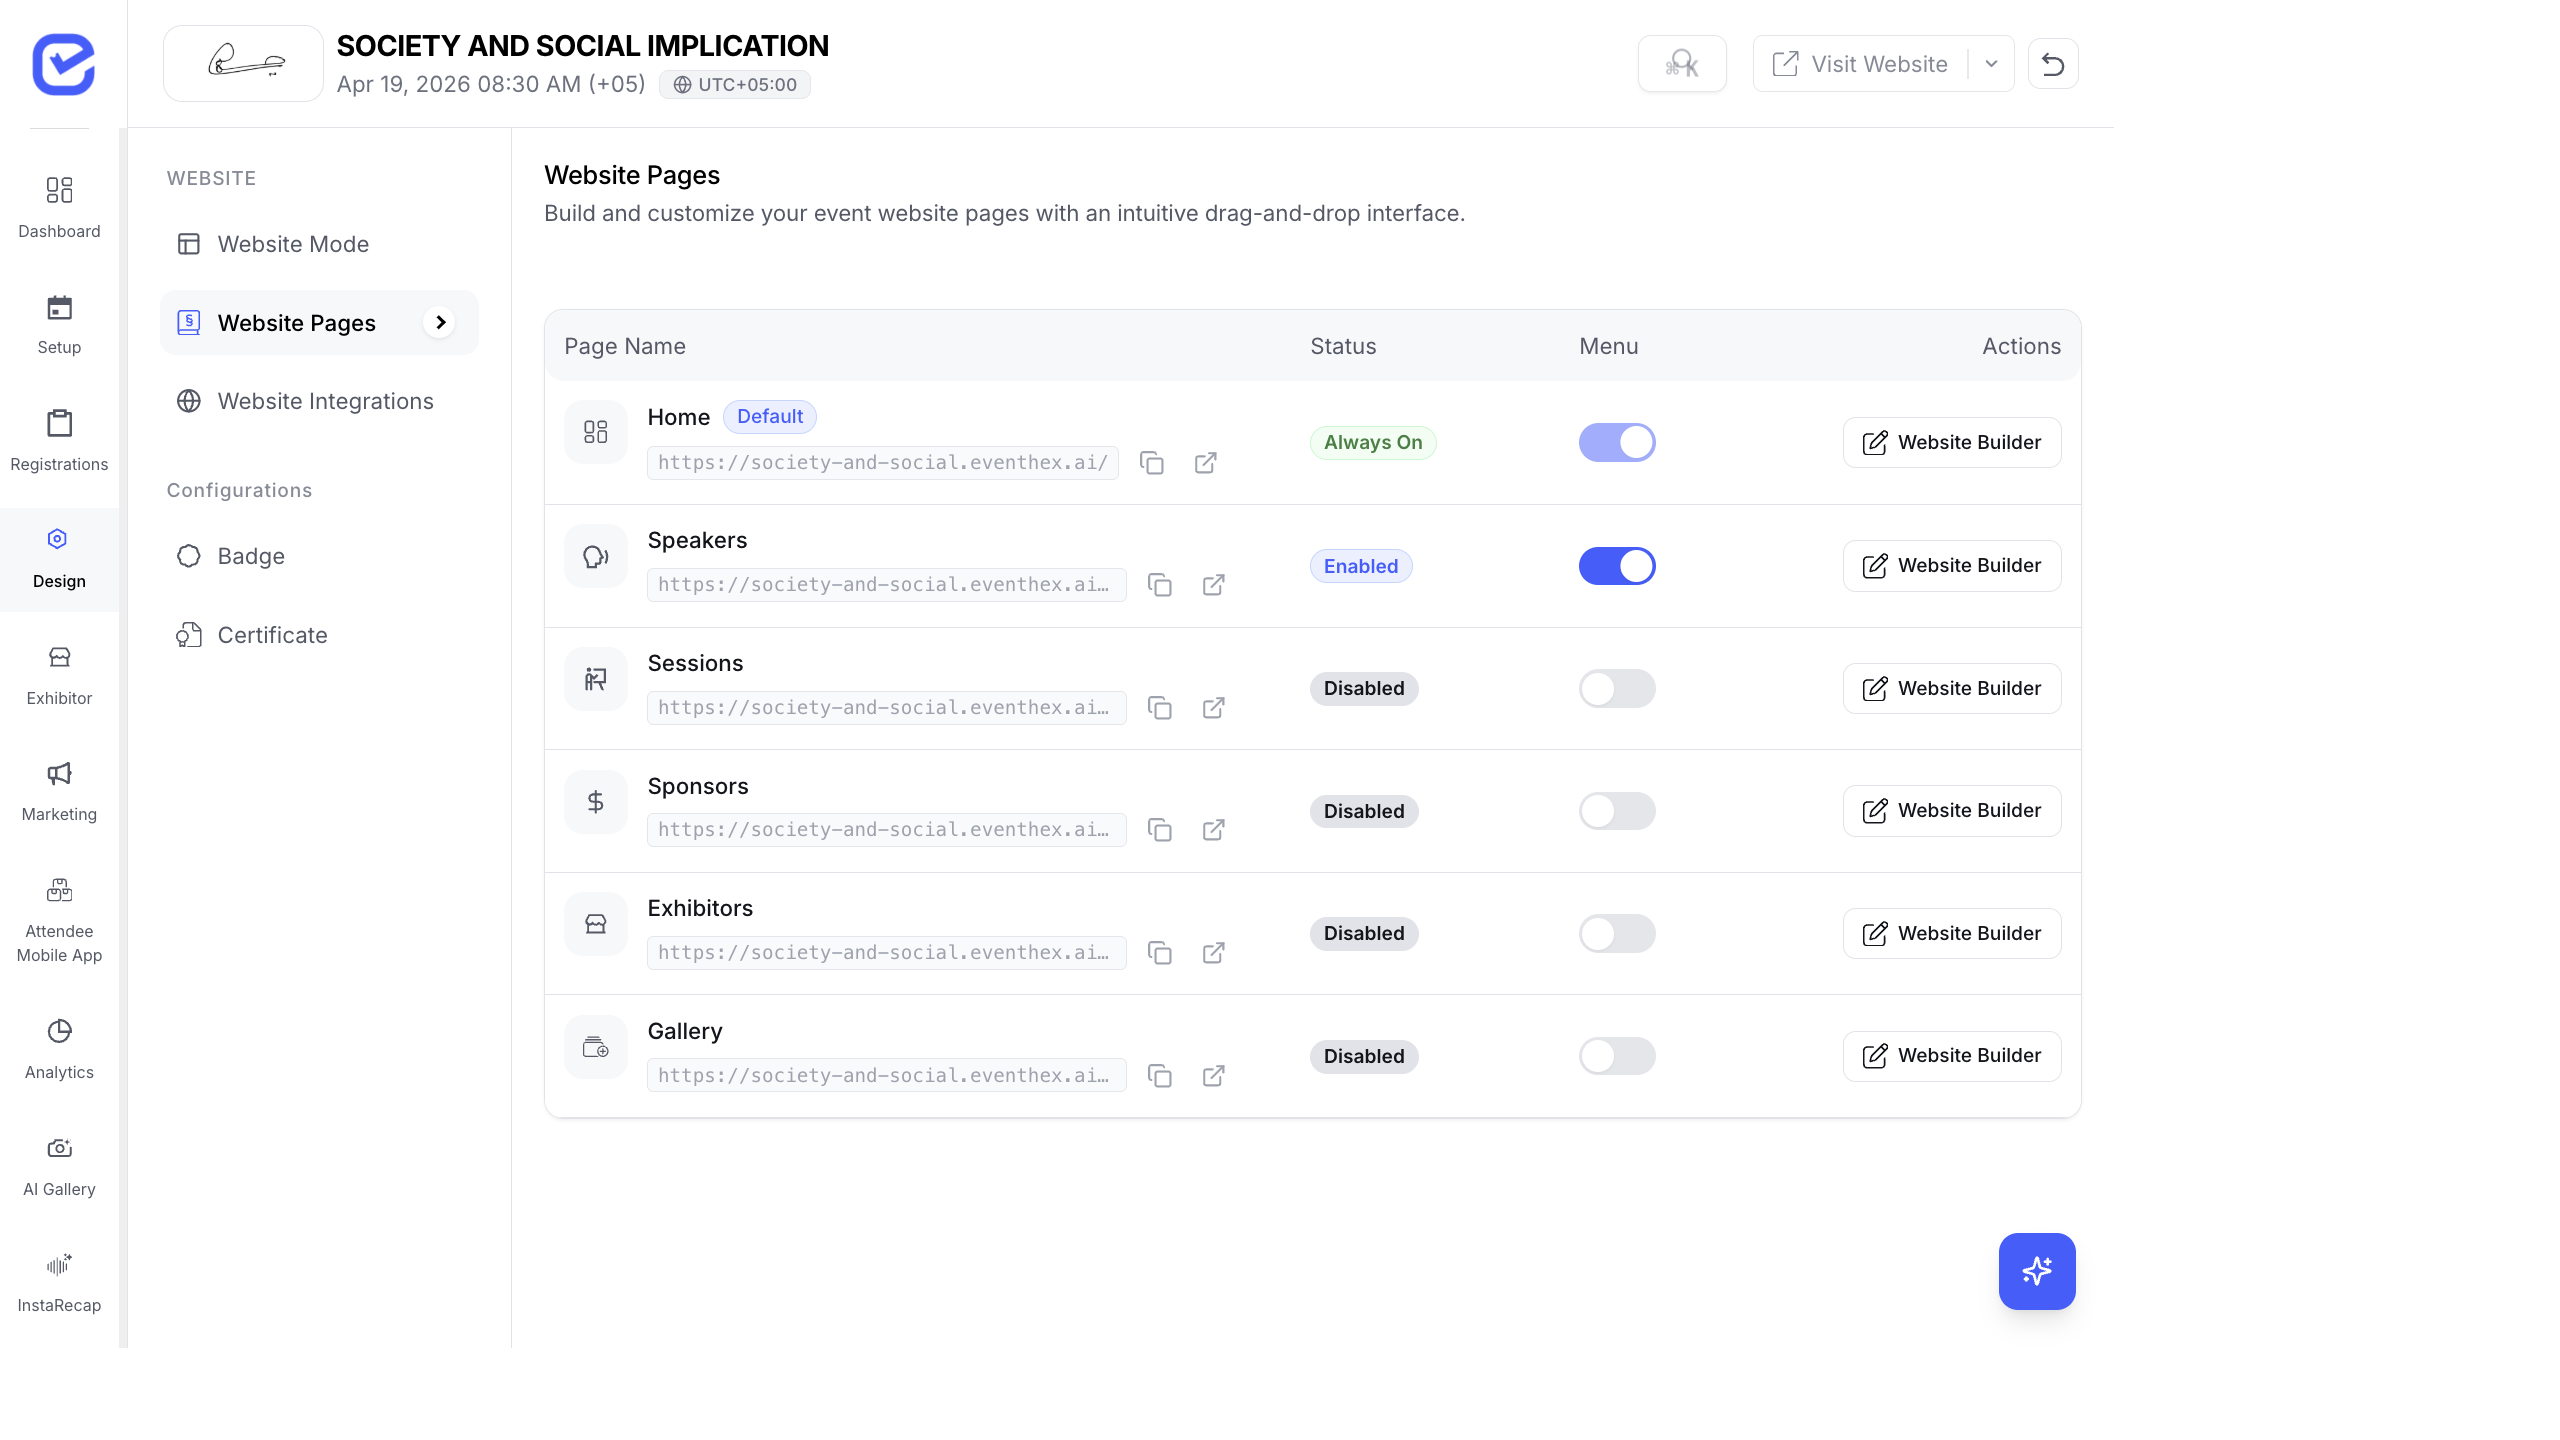
This table shows all available pages for your event website. Each page can be independently enabled or disabled.
| Page | URL | Description |
|---|---|---|
| Home | / | Main landing page with banner, event info, tickets, and more. Always enabled. |
| Speakers | /speakers | Dedicated page listing all event speakers with bios and photos. |
| Sessions | /sessions | Full agenda page with sessions, tracks, and times. |
| Sponsors | /sponsors | Sponsor logos and information. |
| Exhibitors | /exhibitors | Exhibitor company profiles and booth info. |
| Gallery | /gallery | Photo gallery from InstaSnap. |
Enable or Disable a Page
Section titled “Enable or Disable a Page”Each page has a toggle switch in the Status column:
- On (blue) — page is live and accessible
- Off (grey) — page is hidden from visitors
The Home page is always enabled and cannot be turned off.
Menu Toggle
Section titled “Menu Toggle”The Menu toggle controls whether the page appears in the website’s top navigation menu. You might want a page to exist (enabled) but not show in the menu — for example, a Gallery page you only link to from email campaigns.
Step 3: Customize Each Page
Section titled “Step 3: Customize Each Page”Click the Website Builder button on any page row to open the drag-and-drop page builder for that page. This is where you add content blocks, rearrange modules, and customize the visual design.
See the Website Page Builder guide for full details.
Your Event URL
Section titled “Your Event URL”When you create an event, EventHex automatically generates a URL:
https://your-event-slug.eventhex.ai/The slug is based on your event name. For example, an event called “Society and Social Implication” gets the URL https://society-and-social-implication-69cec0.eventhex.ai/.
Each page gets a sub-path:
https://your-event-slug.eventhex.ai/— Homehttps://your-event-slug.eventhex.ai/speakers— Speakershttps://your-event-slug.eventhex.ai/sessions— Sessions
You can copy any page’s URL directly from the Website Pages table — each row shows the full URL with a copy button.
WordPress Mode Setup
Section titled “WordPress Mode Setup”If you chose WordPress Website mode, you need to connect your WordPress site:
- Select WordPress Website in Website Mode.
- EventHex generates an API Key (starts with
evh_). Copy this key. - Enter your WordPress Site URL (e.g.,
https://myconference.com). - Install the EventHex WordPress Plugin on your WordPress site.
- In the plugin settings, paste the API key.
- The plugin connects your WordPress site to EventHex — tickets, speakers, and sessions are pulled automatically.
Visit Your Website
Section titled “Visit Your Website”Click the Visit Website button in the top-right corner of the CMS to open your event website in a new tab. Use this to preview changes after editing.
What Attendees See
Section titled “What Attendees See”Depending on the mode you choose, attendees experience different landing pages:
- Landing Page — Full event website with homepage, speakers, sessions, exhibitors, sponsors, gallery, FAQ, and registration. See Event Website — The Attendee Experience.
- WordPress — Your WordPress-hosted site with EventHex data pulled via plugin.
- AI Gallery Only — Attendees land directly on the AI Photo Gallery. See AI Gallery — The Attendee Experience.
- InstaRecap Only — Attendees land directly on the InstaRecap session summaries. See InstaRecap — The Attendee Experience.