Checkout Settings — Tax, Pricing & Payment Configuration
The checkout page is what attendees see when they register for your event. EventHex gives you full control over its appearance, pricing display, tax configuration, and policies.
Access Checkout Settings
Section titled “Access Checkout Settings”There are two ways to configure checkout:
Go to Setup → Ticket → Global Ticket Settings. This configures defaults that apply to all tickets.
The right sidebar shows quick-access sections: Ticket Settings, Notifications, Ticket Badges, Tax & Discounts, Invoice & Billing, and Terms & Policies.
Go to Setup → Ticket → Single Registration Preview. This opens a split-panel editor with a live preview of the registration form on the right and settings on the left.
Checkout Features
Section titled “Checkout Features”These global toggles control what features are available on the checkout page:
| Feature | Description |
|---|---|
| Collect Attendee Details | Show separate form fields for each ticket in a multi-ticket order |
| Generate Combined Ticket PDF | Create a single PDF with all tickets in the order |
| Limit One Ticket Per Type | Restrict buyers to one of each ticket type |
| Enable Add-Ons | Show optional add-on items during checkout |
| Enable Coupons | Display the discount code input field |
| Enable CAPTCHA | Add anti-bot verification to the checkout |
Header & Branding
Section titled “Header & Branding”Customize how the checkout page header looks:
| Setting | Options |
|---|---|
| Header Appearance | Solid Color or Custom Image |
| Background Color | Any hex color for the header area |
| Header Image | Upload a custom banner image |
| Show Checkout Header | Toggle the header section on/off |
| Show Logo in Header | Display your organization logo |
Color Scheme
Section titled “Color Scheme”Match the checkout to your brand with these color settings:
- Primary Color — buttons, links, and accent elements
- Primary Base / Dark / Darker — shades for hover states and emphasis
- Primary Lighter / Lightest — background tints and subtle highlights
- Secondary Color — complementary color for badges and borders
Pricing & Labels
Section titled “Pricing & Labels”Control how prices and labels appear on the checkout:
| Setting | Description |
|---|---|
| Free Label | What to show for free tickets — options: “FREE”, “0.00”, or a custom label |
| Coupon Discount Format | How discount amounts display (percentage or amount) |
| Download Button Label | Text on the ticket download button |
| Hide Empty Order Summary | Don’t show the order summary panel when cart is empty |
| Group Tickets | Group same-type tickets together in the summary |
Tax Configuration
Section titled “Tax Configuration”- Go to Setup → Ticket → Global Ticket Settings.
- Click Tax & Discounts in the right sidebar.
- Enable Tax toggle.
- Configure your tax rules:
- Tax Name — label shown on invoice (e.g., “GST”, “VAT”, “Sales Tax”)
- Tax Percentage — the rate to apply
- Price Calculation Mode — Inclusive (tax included in price) or Exclusive (tax added on top)
- Click Save.
B2B Tax Settings
Section titled “B2B Tax Settings”For business-to-business events, you can enable B2B mode which:
- Collects company tax ID (GST number, VAT ID) during checkout
- Shows tax breakdown on invoices
- Adds attendee-level tax fields for compliance
Multiple Tax Rules
Section titled “Multiple Tax Rules”You can add multiple tax rules for different tax types (e.g., CGST + SGST for India, or Federal + State tax for the US).
Invoice & Billing
Section titled “Invoice & Billing”Configure how invoices are generated for paid tickets:
- Company Name — your organization’s legal name on the invoice
- Company Address — billing address shown on invoices
- Tax ID / GST Number — your organization’s tax registration number
- Invoice Prefix — prefix for invoice numbers (e.g., “EH-INV-”)
Terms & Policies
Section titled “Terms & Policies”Add legal text that attendees must acknowledge during checkout:
- Go to Tax & Discounts or Terms & Policies section.
- Enable Terms and Conditions.
- Enter your terms text using the rich text editor.
- Optionally enable Consent Checkbox — requires attendees to check a box before completing registration.
- Add Refund Policies if applicable.
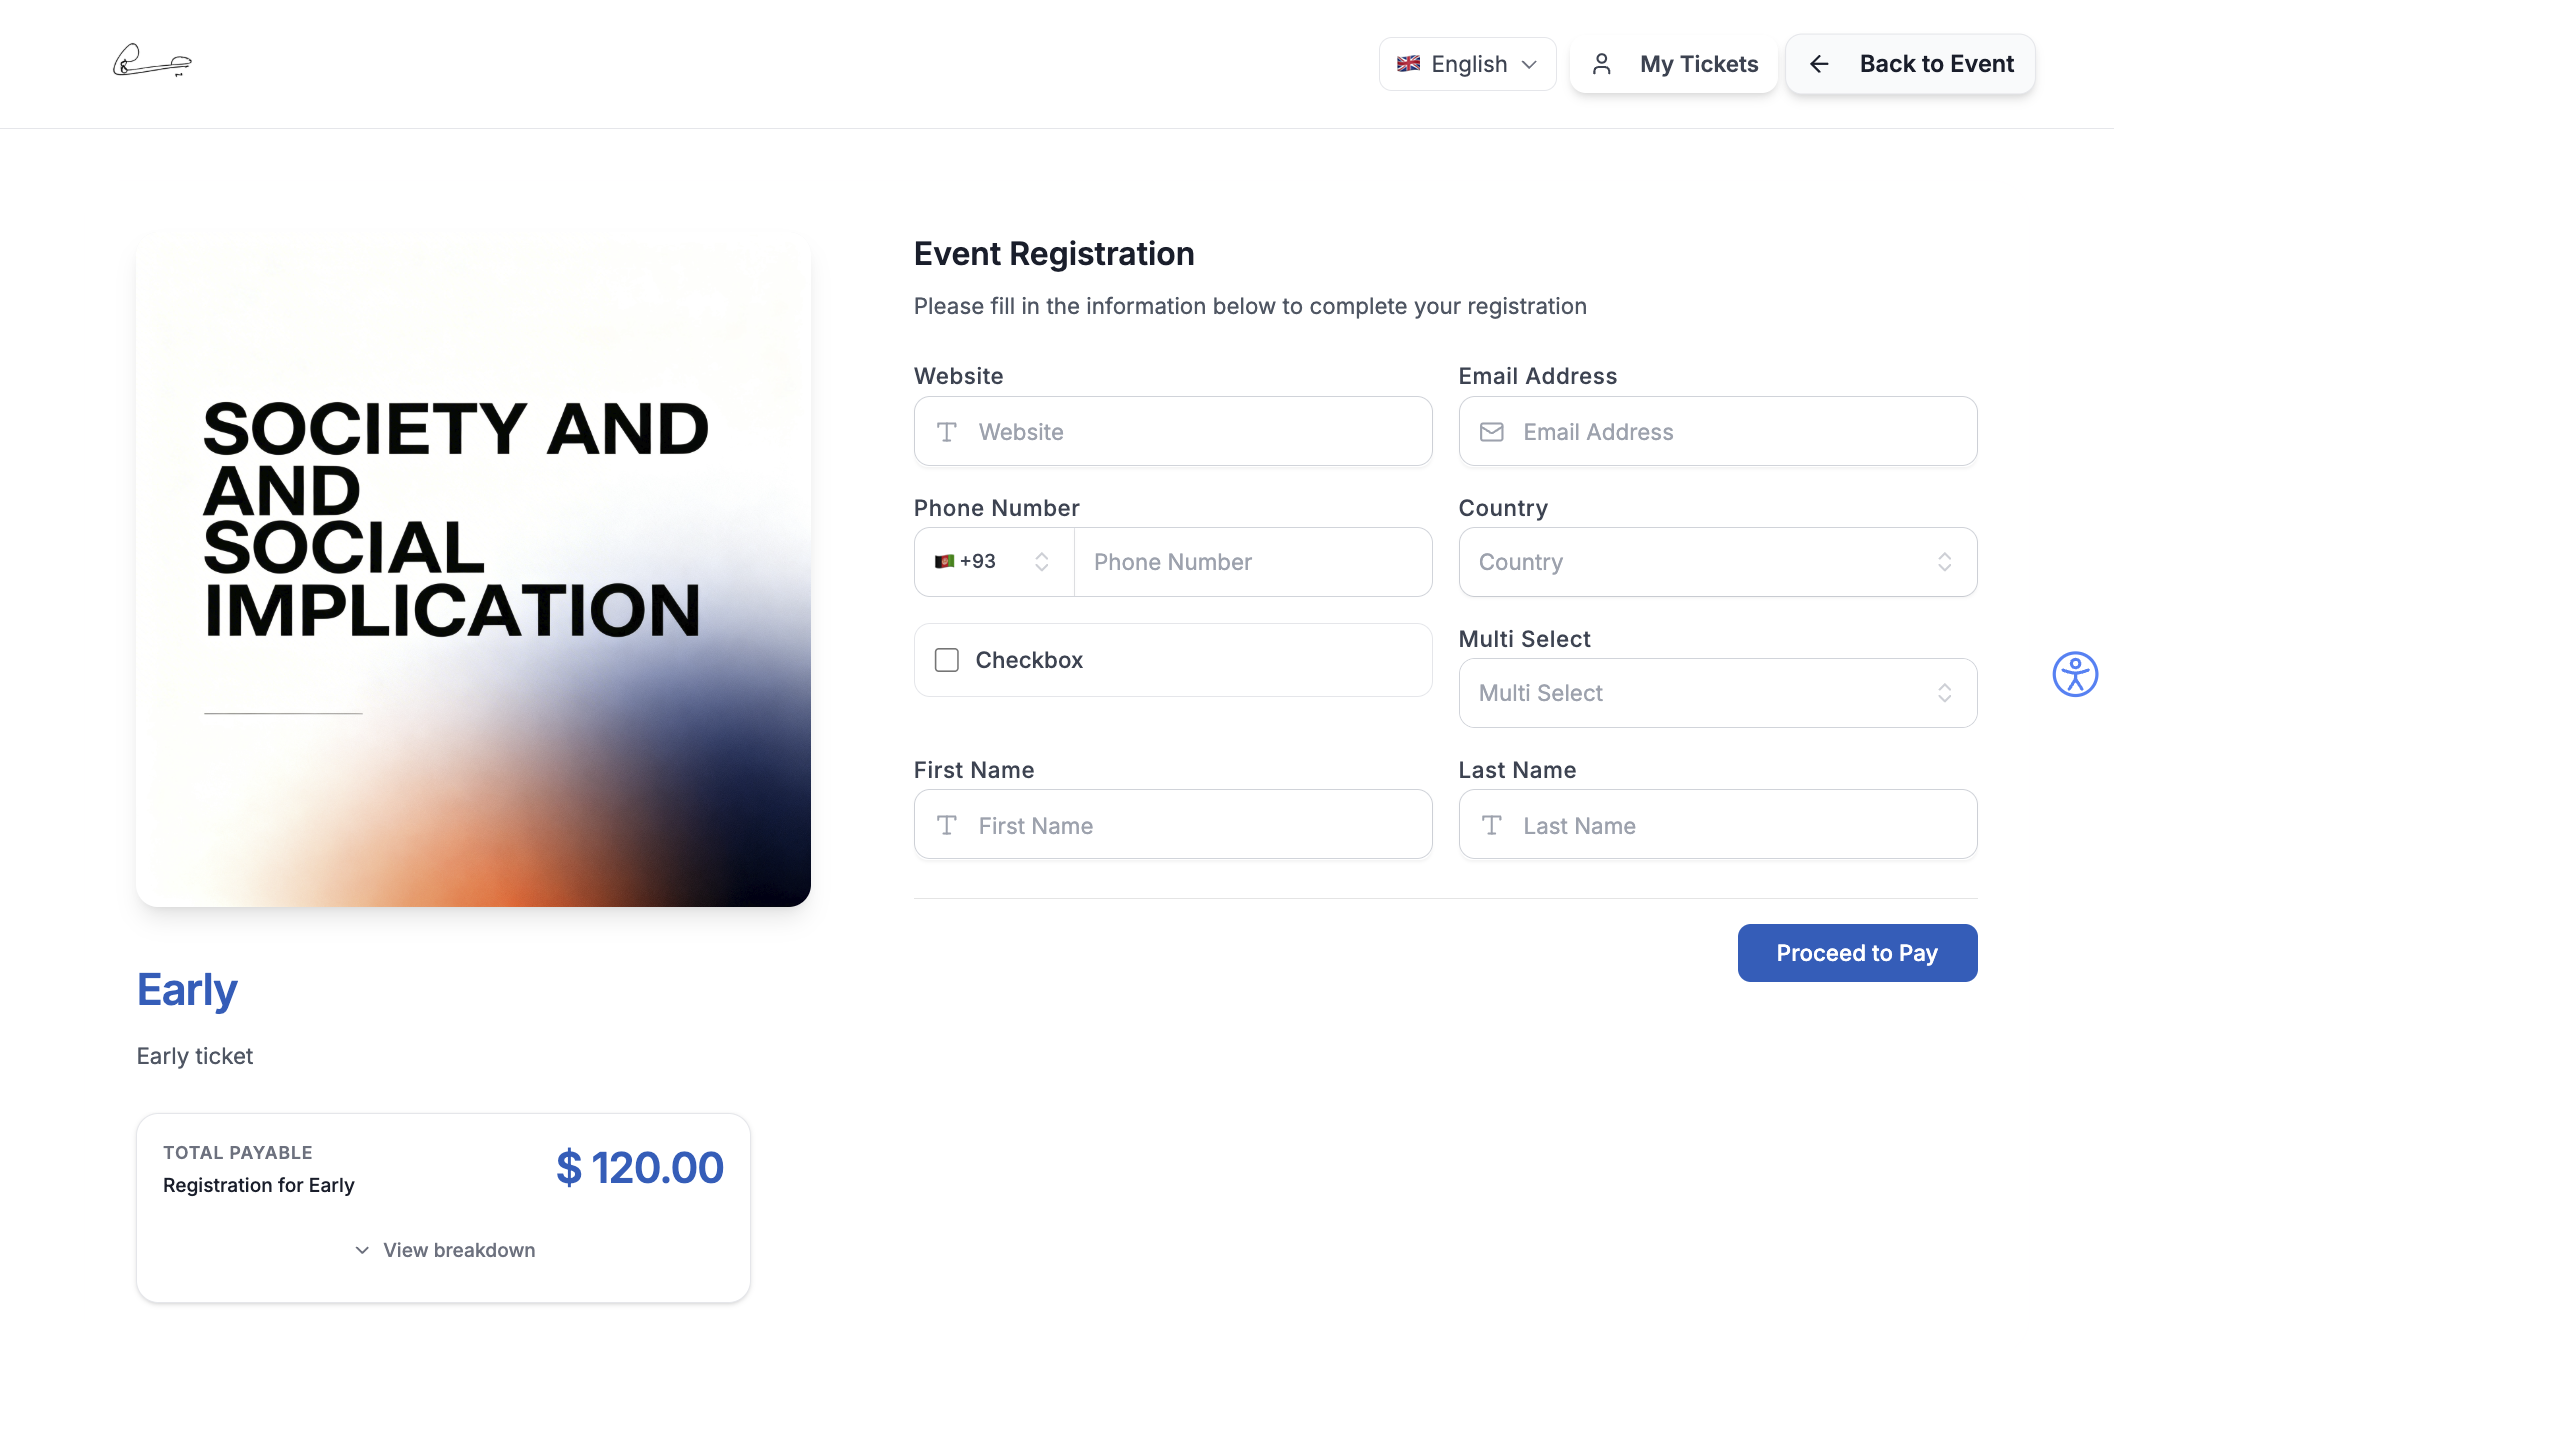
Checkout Preview
Section titled “Checkout Preview”The Single Registration Preview tab provides a live preview of your checkout page. Changes you make in the settings panel update the preview in real time.
The preview loads in an iframe showing the actual public checkout page, so you see exactly what attendees will see — including your header, colors, form fields, and pricing.
How Checkout Appears to Attendees
Section titled “How Checkout Appears to Attendees”On the event website, the checkout page includes:
- Order Summary Panel — itemized list of selected tickets, quantities, individual prices, and total
- Tax Invoice Section — if tax is configured, shows tax breakdown (inclusive or exclusive)
- Coupon Input — field to apply discount codes
- Consent Checkboxes — required checkboxes for terms, privacy policy, or custom consents
- CAPTCHA Widget — bot protection (if enabled)
- Payment Button — integrates with Razorpay, Stripe, or other configured gateway
For the full attendee checkout experience, see The Registration Experience.