Approval Workflow — Managing Attendee Approvals
Some events need to review registrations before confirming attendees. The approval workflow lets you manually approve or reject each registration, with automatic email and WhatsApp notifications at each stage.
When to Use Approval
Section titled “When to Use Approval”- Curated events — review applications before granting access
- VIP or invite-only tickets — screen registrants against a guest list
- Capacity management — hold registrations in a queue and release seats gradually
- Academic conferences — review abstracts or credentials before accepting
Enable Approval for a Ticket
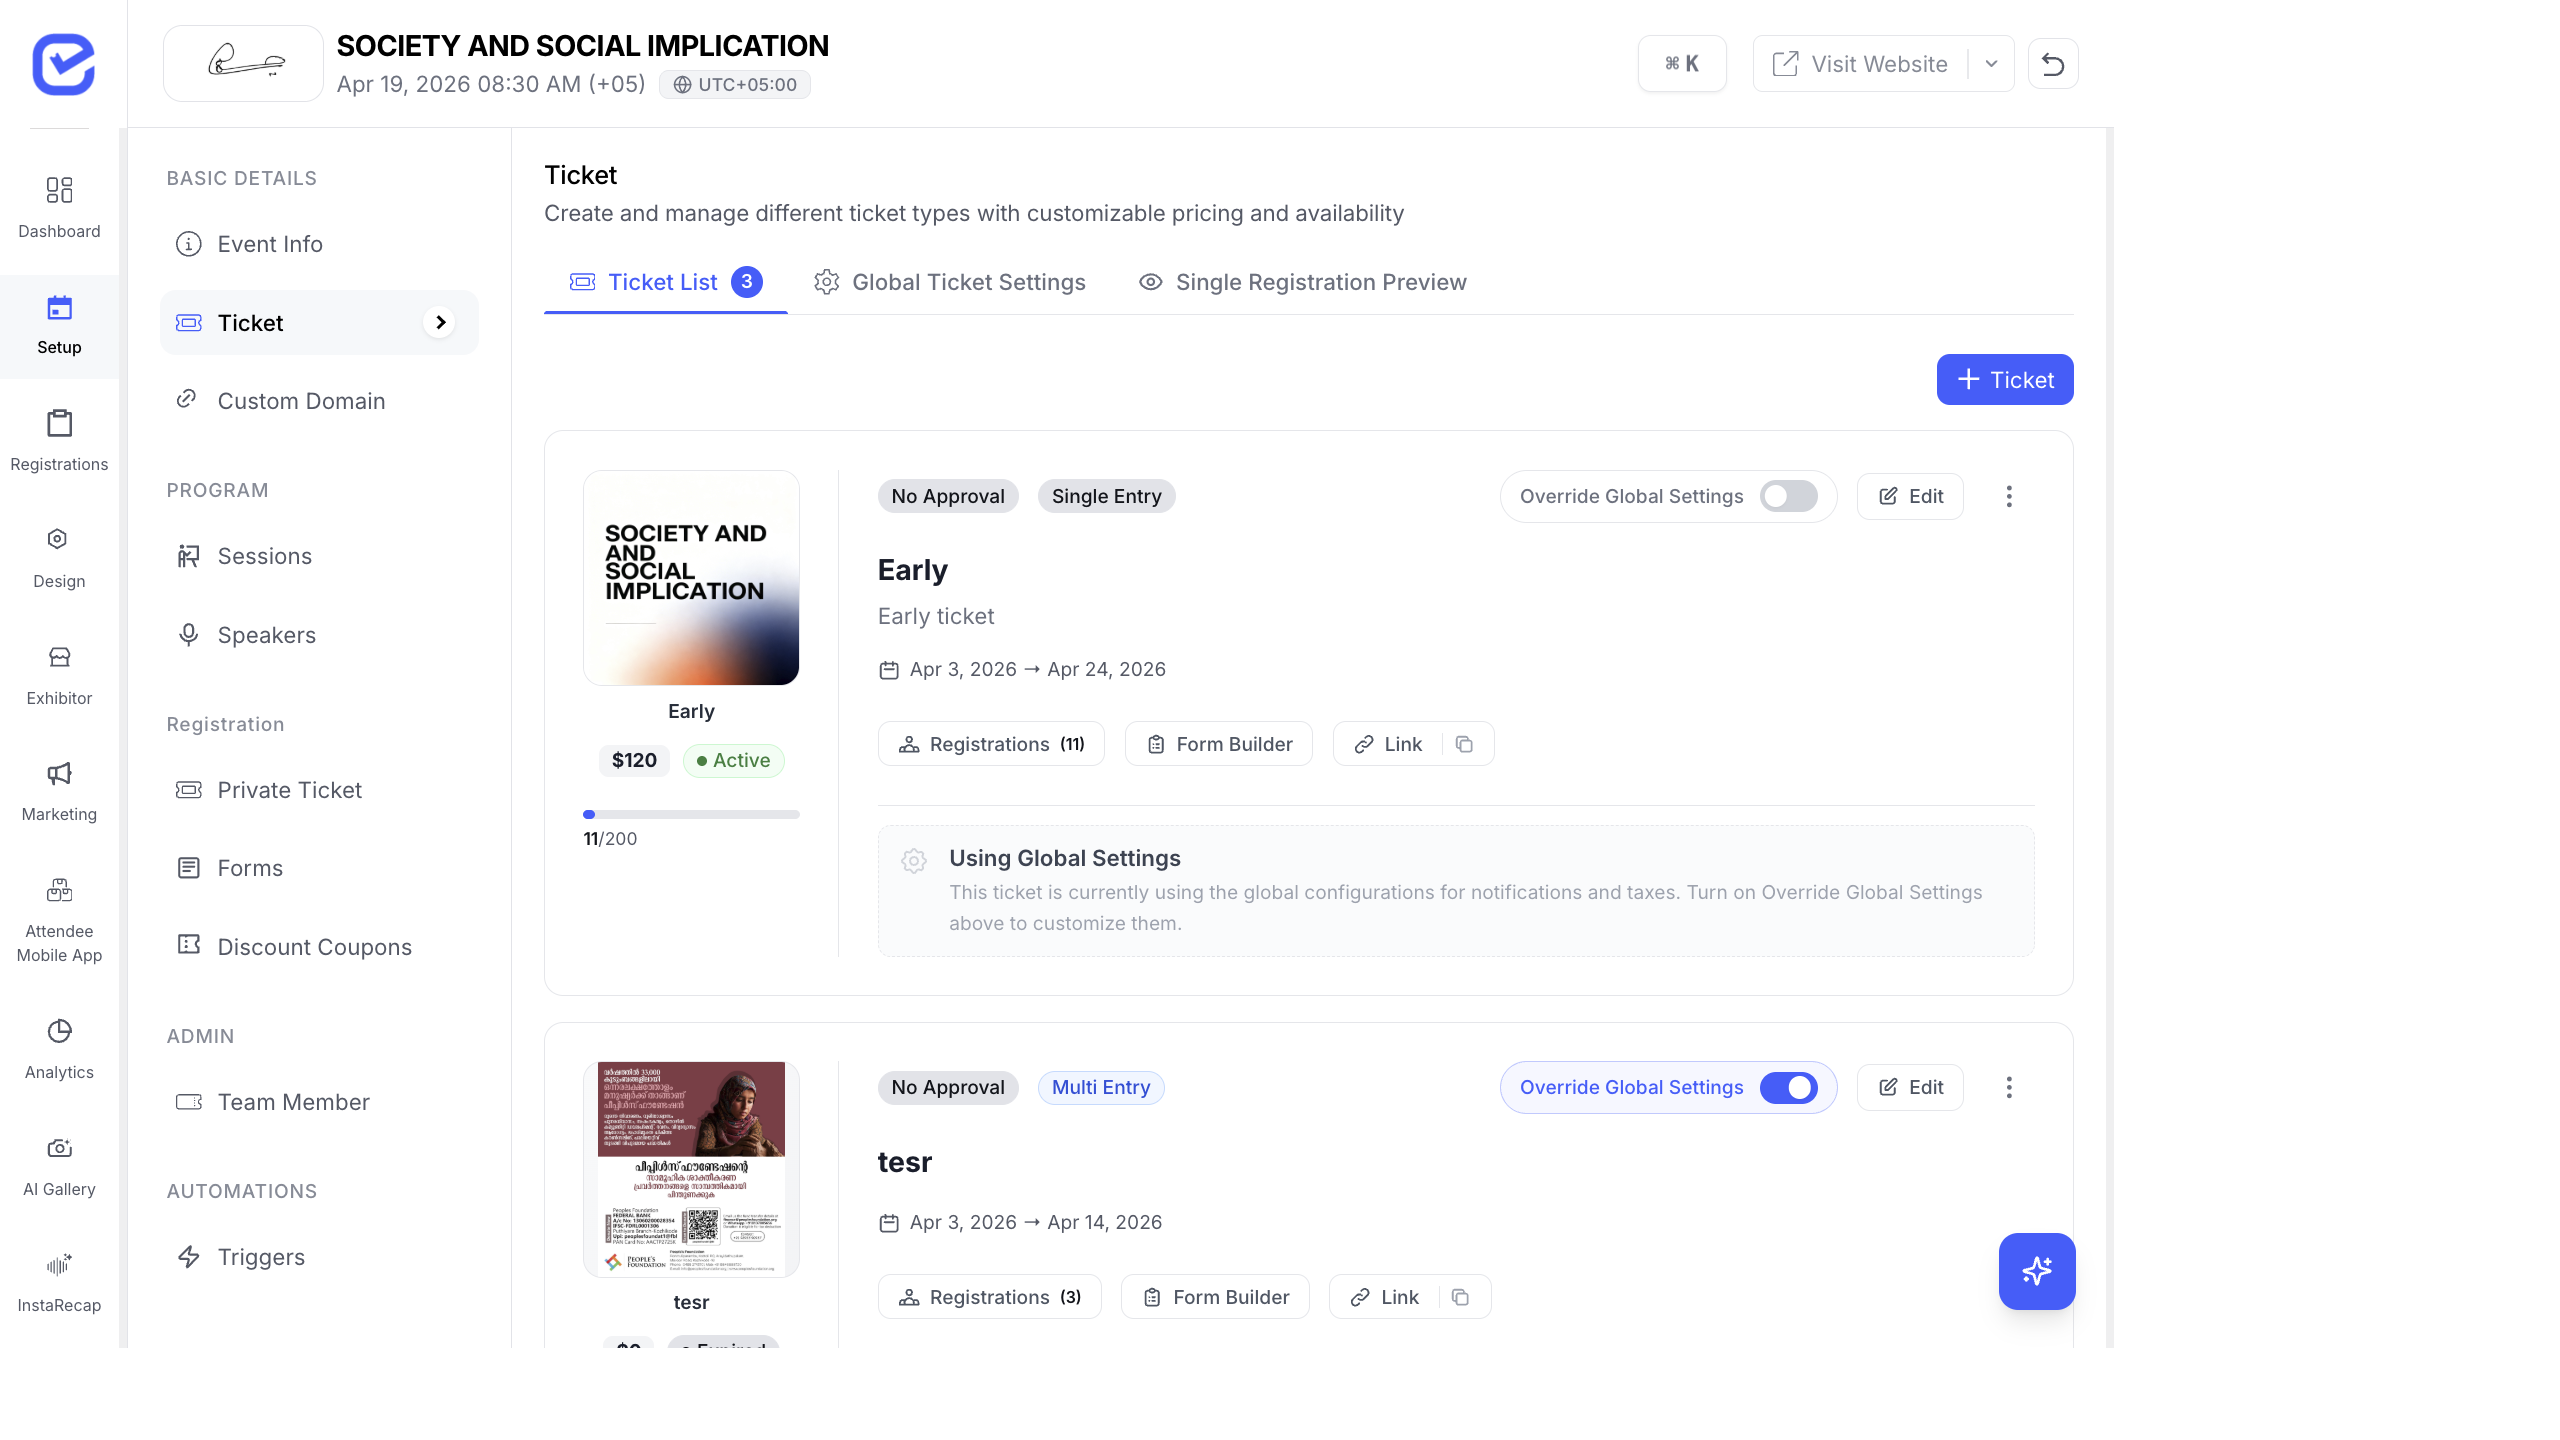
Section titled “Enable Approval for a Ticket”- Go to Setup → Ticket.
- Find the ticket that needs approval.
- Toggle on Override Global Settings on the ticket card.
- Click the Approval button under NOTIFICATIONS & DELIVERY.
- Enable Requires Approval toggle.
- Configure your approval notification templates (see below).
- Click Save.
How the Approval Flow Works
Section titled “How the Approval Flow Works”- Attendee registers → status is set to Pending
- You review the registration in the Registrations panel
- Approve or Reject the registration
- Notification sent automatically via email and/or WhatsApp
Configure Approval Notifications
Section titled “Configure Approval Notifications”When you open the Approval settings popup, you can customize notifications for both outcomes:
Approval Notifications
Section titled “Approval Notifications”| Setting | Description |
|---|---|
| Enable Approval Email | Send a confirmation email when you approve a registration |
| Email Template | Customize the approval email content and design |
| Enable Approval WhatsApp | Send a WhatsApp message on approval |
| WhatsApp Template | Select the WhatsApp template to use |
Rejection Notifications
Section titled “Rejection Notifications”| Setting | Description |
|---|---|
| Enable Rejection Email | Send a notification email when you reject a registration |
| Rejection Email Template | Customize the rejection email content |
| Enable Rejection WhatsApp | Send a WhatsApp message on rejection |
| WhatsApp Template | Select the WhatsApp template to use |
Approve or Reject Registrations
Section titled “Approve or Reject Registrations”- Go to Registrations in the left sidebar.
- Select the ticket tab that has approval enabled.
- Pending registrations will show with a Pending status badge.
- Click on a registration to view the details.
- Click Approve to confirm or Reject to decline.
- The attendee receives the corresponding notification automatically.
You can also perform bulk actions:
- Select multiple registrations using the checkboxes
- Use the toolbar actions to approve or reject all selected registrations at once
Global vs Per-Ticket Approval
Section titled “Global vs Per-Ticket Approval”| Configuration | Behavior |
|---|---|
| Global (off) + Ticket (off) | All registrations auto-confirmed |
| Global (off) + Ticket override (on) | Only that ticket requires approval |
| Global (on) + No override | All tickets require approval |
| Global (on) + Ticket override (off) | That specific ticket skips approval |
Approval Status Reference
Section titled “Approval Status Reference”| Status | Meaning |
|---|---|
| Pending | Registration submitted, awaiting review |
| Approved | Registration confirmed, attendee notified |
| Rejected | Registration declined, attendee notified |
| Confirmed | Registration auto-confirmed (no approval needed) |
What Attendees See
Section titled “What Attendees See”When approval is enabled, the attendee experience changes:
- After submitting their registration, attendees see a “Registration Pending Approval” message instead of a confirmation.
- They receive an email notification when their registration is approved or rejected.
- Approved attendees receive their ticket, badge, and any confirmation emails.
- Rejected attendees receive a rejection notification (if configured).
See The Registration Experience for the full checkout and approval flow.