Viewing & Managing Registrations
The Registrations section is your central hub for managing all attendees. View registrations by ticket type, search for specific attendees, perform bulk actions, and export data.
Access Registrations
Section titled “Access Registrations”Click Registrations in the left sidebar of your event. This opens the registration management page.
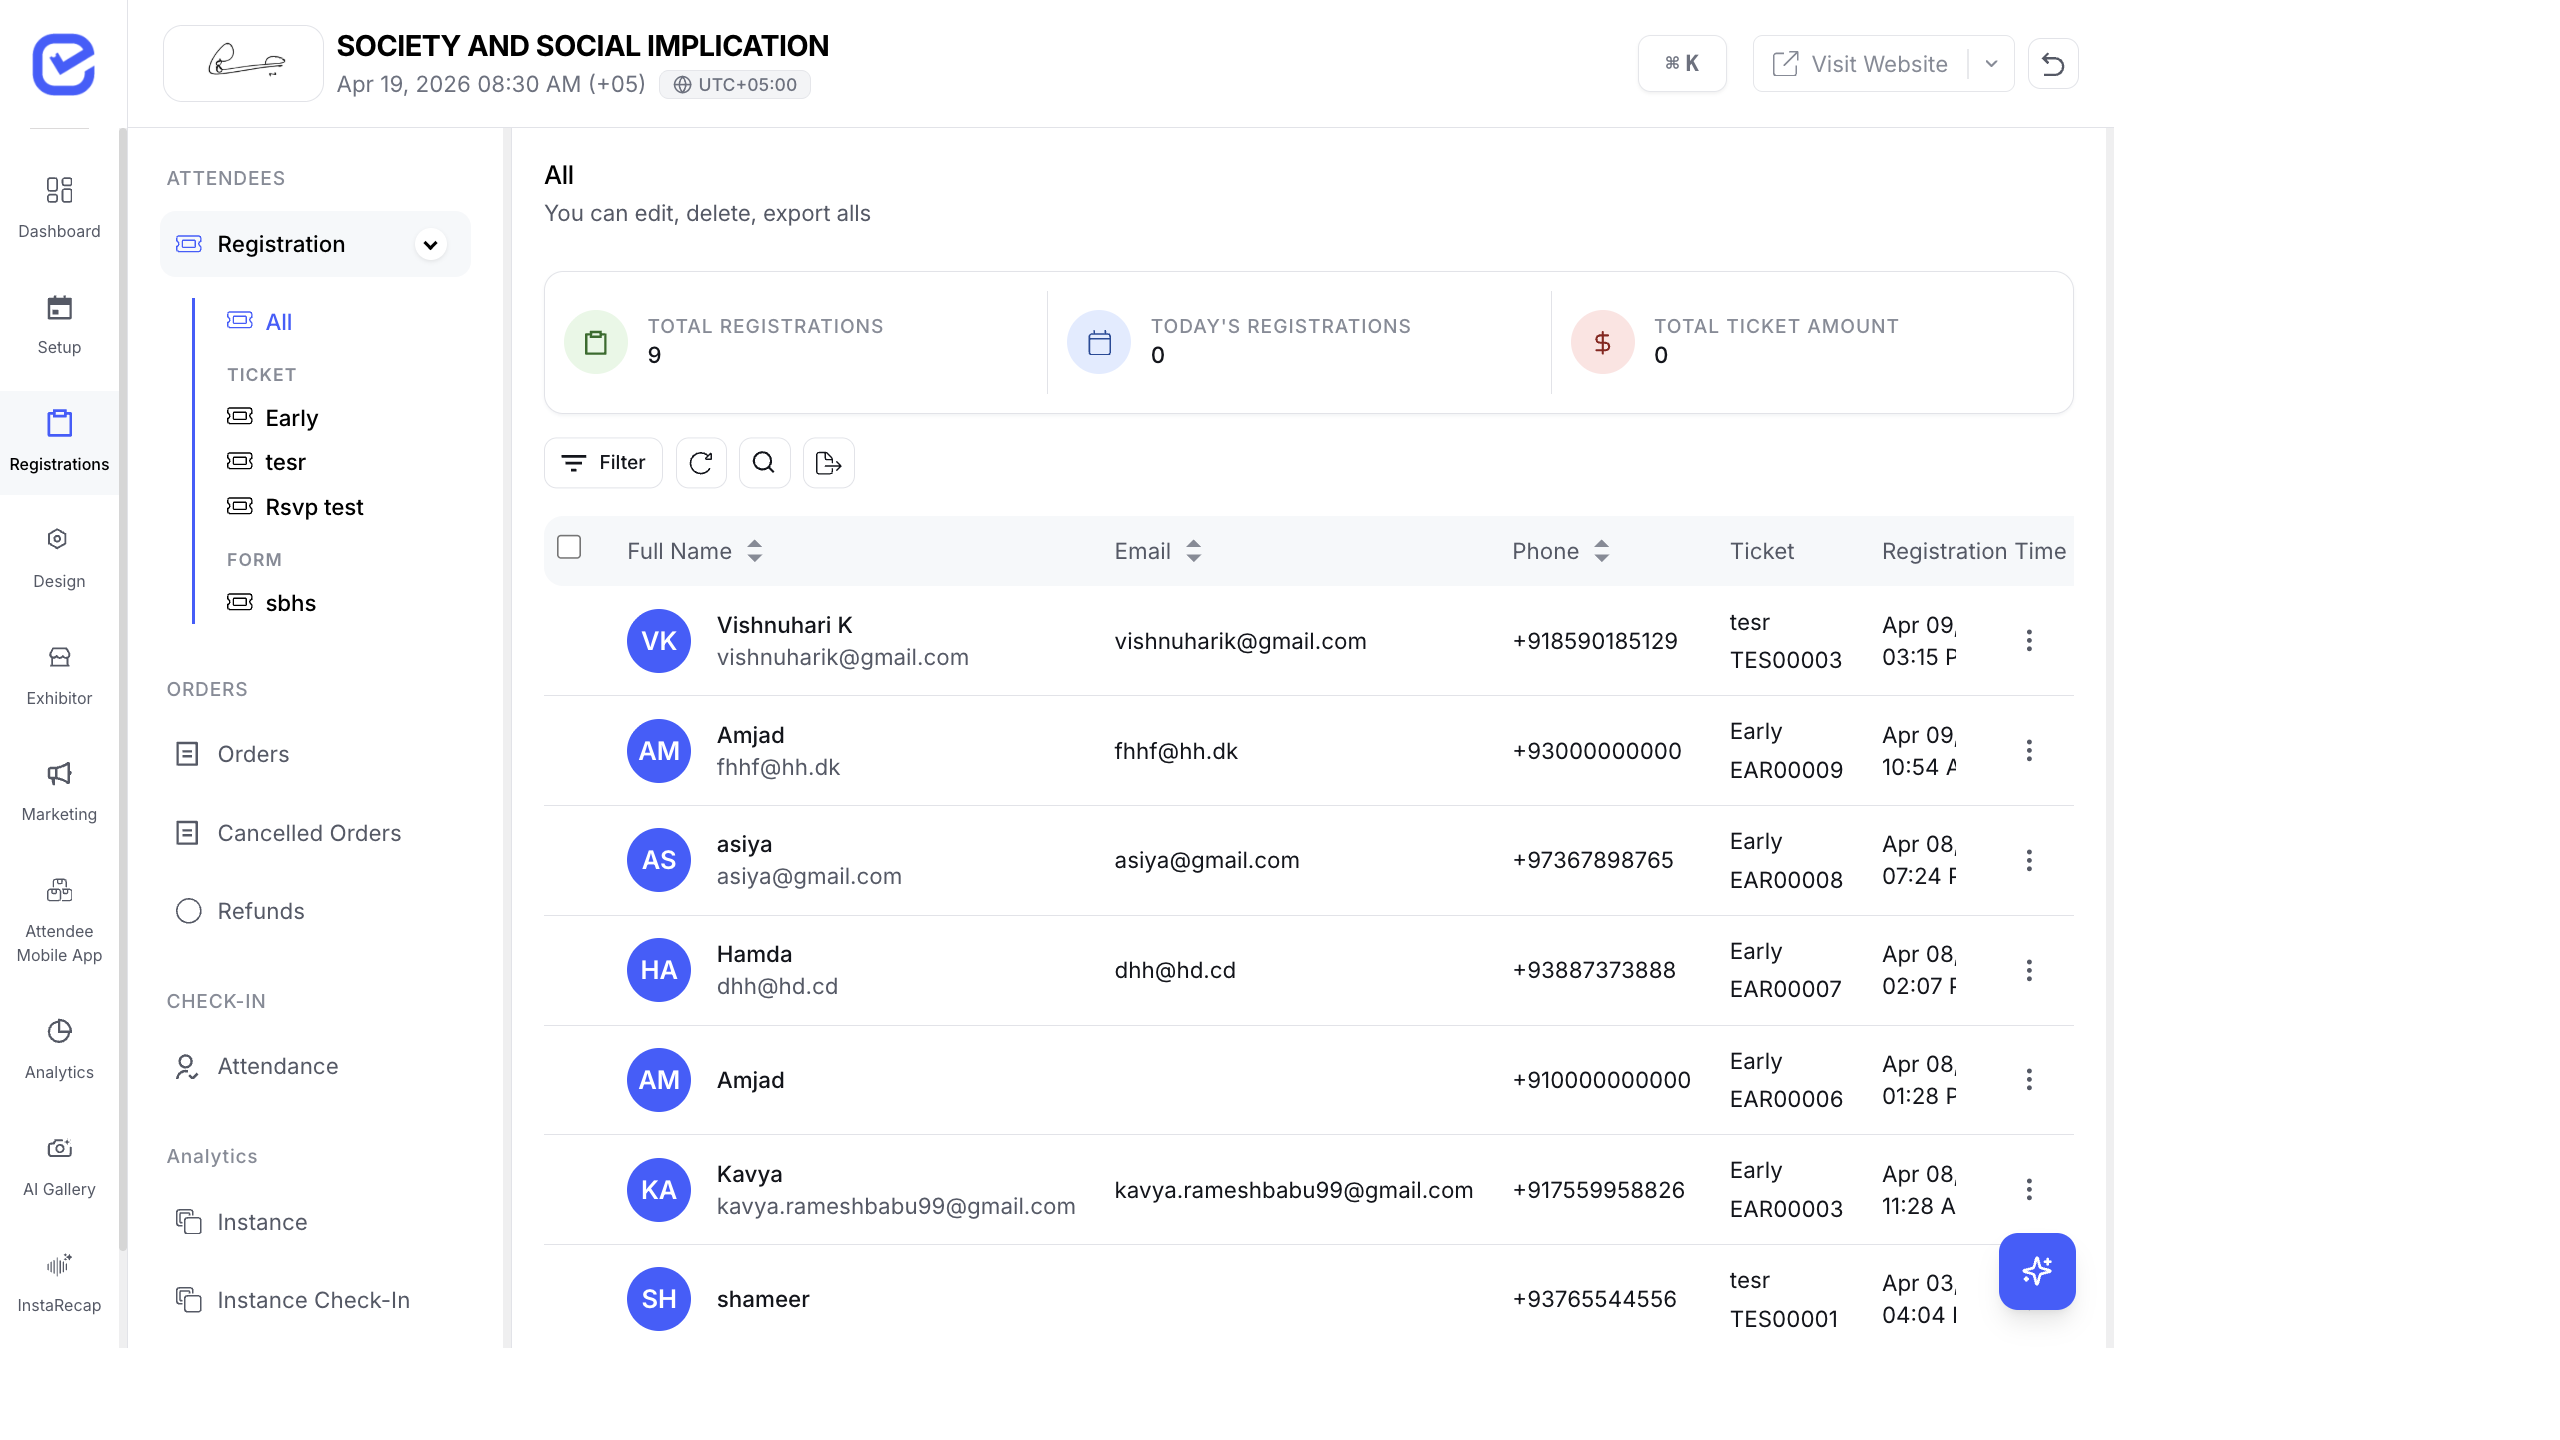
Page Layout
Section titled “Page Layout”The Registrations page has three main areas:
Top Stats Bar
Section titled “Top Stats Bar”| Metric | Description |
|---|---|
| Total Registrations | Total number of registrations across all tickets |
| Today’s Registrations | Registrations received today |
| Total Ticket Amount | Total revenue from paid ticket sales |
Left Sidebar
Section titled “Left Sidebar”The sidebar organizes registrations by source:
- ATTENDEES → Registration — main registration section
- All — combined view of all registrations
- Ticket tabs — one tab per ticket type (e.g., Early, VIP, General)
- Form tabs — one tab per standalone form
- ORDERS — payment and order management
- Orders — all ticket purchase orders
- Cancelled Orders — orders that were cancelled
- Refunds — refund requests and status
- CHECK-IN — on-site attendance tracking
- Attendance — check-in records
- Analytics — registration analytics
- Instance — instance-based analytics
- Instance Check-In — check-in analytics per instance
Main Table
Section titled “Main Table”The registration table shows:
- Full Name — attendee’s full name (with avatar initials)
- Email — registration email address
- Phone — phone number with country code
- Ticket — which ticket type they registered with
Filter and Search
Section titled “Filter and Search”Use the toolbar above the table to find specific registrations:
- Filter — filter by ticket type, registration date, status, custom fields
- Search — search by name, email, or phone number
- Refresh — reload the latest data
- Export — download registrations as CSV/Excel
View Registration Details
Section titled “View Registration Details”Click on any registration row to open the detail panel. This shows:
- All form field responses (name, email, phone, and custom fields)
- Registration status (Confirmed, Pending, Rejected)
- Ticket type and order information
- Check-in status
- Badge preview
Edit a Registration
Section titled “Edit a Registration”- Click on a registration row to open the detail panel.
- Click the Edit button.
- Modify the attendee’s details (name, email, phone, custom fields).
- Click Save.
Bulk Actions
Section titled “Bulk Actions”Select multiple registrations using the checkboxes on the left, then use the toolbar actions:
| Action | Description |
|---|---|
| Resend Confirmation | Resend the confirmation email/WhatsApp to selected attendees |
| Generate Badge | Generate badges for selected attendees |
| Check-In | Mark selected attendees as checked in |
| Send Certificate | Send event certificates to selected attendees |
| Approve / Reject | Approve or reject pending registrations (if approval is enabled) |
| Delete | Remove selected registrations |
Add a Registration Manually
Section titled “Add a Registration Manually”You can add attendees directly without them going through the checkout:
- Go to Registrations → (ticket tab).
- Click the + Add button in the toolbar.
- Fill in the attendee details.
- Select the ticket type.
- Click Save.
Export Registrations
Section titled “Export Registrations”Click the Export icon in the toolbar to download registrations. The export includes:
- All standard fields (name, email, phone)
- All custom form fields
- Registration date and status
- Ticket type and order details
The file is exported as a CSV that you can open in Excel, Google Sheets, or any spreadsheet application.
Registration by Ticket vs Form
Section titled “Registration by Ticket vs Form”| Source | How to Access | What It Shows |
|---|---|---|
| Ticket Registration | Click a ticket tab (e.g., Early, VIP) | Registrations for that specific ticket type |
| Form Registration | Click a form tab (e.g., sbhs) | Responses submitted through standalone forms |
| All | Click the “All” tab | Combined view of all registrations across all tickets and forms |